


How to Use an EMS Device on Your Jawline for a Slimmer Face?

Most people chasing a sharper jawline spend months on facial exercises and contouring makeup — only to get inconsistent, frustrating results. EMS (Electrical Muscle Stimulation) technology changes that equation entirely. By delivering low-level electrical pulses at 20–100 Hz directly to the muscles along your jawline and under your chin, EMS induces involuntary muscle contractions that you simply cannot replicate manually.
This guide walks you through exactly how to use an EMS device on your jawline safely and effectively. You’ll learn the correct technique, the settings that actually deliver results, common mistakes that cause more harm than good, and how to build a routine that compounds over weeks — not just overnight.

What EMS Actually Does to Your Jawline Muscles And Why It Works?
Before picking up a device, understanding the mechanism behind EMS prevents both underwhelming results and unnecessary risk.
EMS devices emit biphasic electrical pulses — currents that alternate direction — targeting the masseter, platysma, and digastric muscles along your jaw and neck. At the right intensity (typically 20–80 Hz for toning, 1–10 Hz for relaxation), these pulses trigger Type II fast-twitch muscle fibers that are notoriously difficult to engage through voluntary movement alone. Think of it as a concentrated workout for muscles your gym routine completely ignores.
A key differentiation: quality at-home EMS devices operate in the 100–500 microampere (μA) range for microcurrent facial applications, while body-grade EMS runs at milliampere (mA) levels. Facial EMS specifically targets superficial muscles — the platysma and the depressor anguli oris — producing visible lift along the jawline without the deep tissue fatigue associated with body devices.
What the research says: A 2021 clinical study published in Skin Research & Technology found that participants using facial EMS 5 times per week for 8 weeks showed a statistically significant improvement in facial muscle tone and reduction in mandibular jowling compared to control groups. Results were most pronounced in participants aged 35–55. The study noted that consistent use — not intensity — was the primary driver of outcome.
The failure mode to avoid: Devices using uniphasic (single-direction) currents can overstimulate facial muscles asymmetrically, leading to one-sided tension or, in chronic overuse cases, a paradoxical softening of muscle tone. Always verify your device uses biphasic waveform technology before purchasing.
Choosing the Right EMS Device for Jawline Contouring
Not all EMS devices are created equal, and the market ranges from $30 gadgets to $600 clinical-grade tools. Here’s how to evaluate what’s worth your investment.
Key Specifications to Look For
Frequency range: For jawline toning specifically, look for devices with a selectable frequency range of at least 20–100 Hz. Devices locked to a single frequency limit your ability to progress as muscles adapt.
Current output: Facial EMS devices should operate in the 100–500 μA range for safety and efficacy. Anything above 1 mA on the face requires clinical supervision.
Waveform type: Biphasic symmetrical waveforms are the gold standard for facial use. They prevent charge buildup in tissue, which reduces risk of burns and uneven stimulation.
Auto shut-off: A mandatory safety feature. Sessions beyond 15 minutes on any single facial zone can cause muscle fatigue that counterproductively softens tone.
Electrode material: Stainless steel or gold-plated electrodes maintain consistent conductivity. Avoid cheap alloy electrodes that oxidize quickly and deliver uneven current.
At-Home vs. Professional EMS: A Practical Comparison
| Factor | At-Home Device | Professional Treatment |
|---|---|---|
| Frequency options | 20–100 Hz (limited) | 1–2,000 Hz (full range) |
| Session duration | 5–15 min | 30–60 min |
| Current intensity | 100–500 µA | Up to 100+ mA |
| Sessions per week | 3–5 | 1–2 |
| Cost per session | Pennies | $80–$300 |
| Visible results timeline | 6–10 weeks | 3–6 sessions |
For most people, a high-quality at-home device used consistently over 8–12 weeks rivals or exceeds the cumulative results of monthly professional sessions — at a fraction of the cost.
For a curated selection of devices that meet these technical benchmarks, see [The 10 Best EMS Facial Tightening Devices of 2026] and [The 10 Best Jawline Contouring Devices for Home Use in 2026] for side-by-side comparisons with verified specs.
Step-by-Step: How to Use an EMS Device on Your Jawline?

This is the protocol that delivers results. Every step has a purpose — skip one and you compromise both safety and efficacy.
Step 1: Cleanse Thoroughly
Remove all makeup, SPF, oils, and skincare residue. Any barrier between the electrode and your skin increases impedance, forces the device to work harder, and creates uneven current distribution. Use a gentle, non-stripping cleanser; your skin should feel clean but not tight.
Why this matters: Residual silicones from primers or moisturizers can raise skin impedance by up to 40%, effectively muting the signal before it reaches the target muscle.
Step 2: Apply Conductive Gel Generously
This step is non-negotiable. Conductive gel does three things: it lowers skin impedance to allow clean signal transmission, it prevents the localized heat buildup that causes micro-burns, and it allows the device to glide without dragging — which protects the dermal-epidermal junction.
Apply a layer approximately 2–3mm thick along your jawline, chin, and upper neck. Purpose-formulated conductive gels (with sodium chloride or aloe base) outperform DIY alternatives. Do not substitute with regular moisturizer — the salt ion content in dedicated gels is what creates conductivity.
Step 3: Set Intensity to Level 1 and Power On
Start at the lowest intensity setting every single session — even after months of regular use. Your muscles’ response threshold shifts day to day based on hydration, sleep, and systemic inflammation. Starting low and building up protects against accidental overstimulation.
Aim for a “gentle fluttering” sensation — visible muscle twitching with zero pain. If you feel stinging or burning rather than pulsing, the intensity is too high or the gel layer is insufficient.
Step 4: Execute the Jawline Sweep Technique
Starting position: Place both electrode heads directly under your chin, centered on the chin pad.
The movement: Use slow, deliberate upward and outward strokes, following the natural contour of your jawline from chin to earlobe. Each stroke should take 3–4 seconds. This direction works with facial lymphatic drainage pathways, which enhances the lifting effect and reduces post-session puffiness.
Hold technique for targeted firming: At the apex of each sweep (just anterior to the earlobe), pause and hold the device in place for 2–3 seconds before lifting off. This recruits the deeper masseter and promotes localized muscle contraction in the area most responsible for jaw definition.
Repeat: 8–10 upward sweeps per side. Always complete one full side before moving to the other to maintain symmetry.
Step 5: Time Your Session and Finish Correctly
Keep total lower face EMS time to 5–10 minutes per session. Exceeding this creates diminishing returns and risks overstimulating the platysma, which can paradoxically weaken the muscle over time — the same way overtraining at the gym causes regression, not progress.
When done, turn off the device before removing it from your skin. Removing an active electrode causes a sudden discharge that can feel like a pinch and may startle you into an asymmetric muscle response.
Wipe remaining gel with a warm, damp cloth, then follow with your preferred serum or moisturizer. Post-EMS skin has heightened ingredient absorption for approximately 20–30 minutes — a good window for peptide or hyaluronic acid serums.
Building Your Weekly EMS Jawline Routine

Consistency is the only variable that separates people who see results from those who don’t. EMS works on the same physiological principle as exercise: progressive overload over time.
Weeks 1–2 (Adaptation Phase): 3 sessions per week, intensity at 1–3, 5-minute sessions. Your muscles are learning neuromuscular recruitment patterns. Do not chase intensity.
Weeks 3–6 (Building Phase): 4 sessions per week, intensity at 3–5, 7-minute sessions. You should begin to notice reduced jowl appearance and more defined chin-to-ear contour by week 4.
Weeks 7–12 (Consolidation Phase): 4–5 sessions per week, intensity at 5–7, 8–10 minute sessions. Most users report their most dramatic visible results in this window. Photograph your jawline weekly in the same lighting and angle for accurate progress tracking.
Maintenance (Week 12+): 2–3 sessions per week at your established intensity. Like any muscle conditioning program, results regress without maintenance — approximately 40% of muscle tone improvement is lost within 4 weeks of stopping completely.
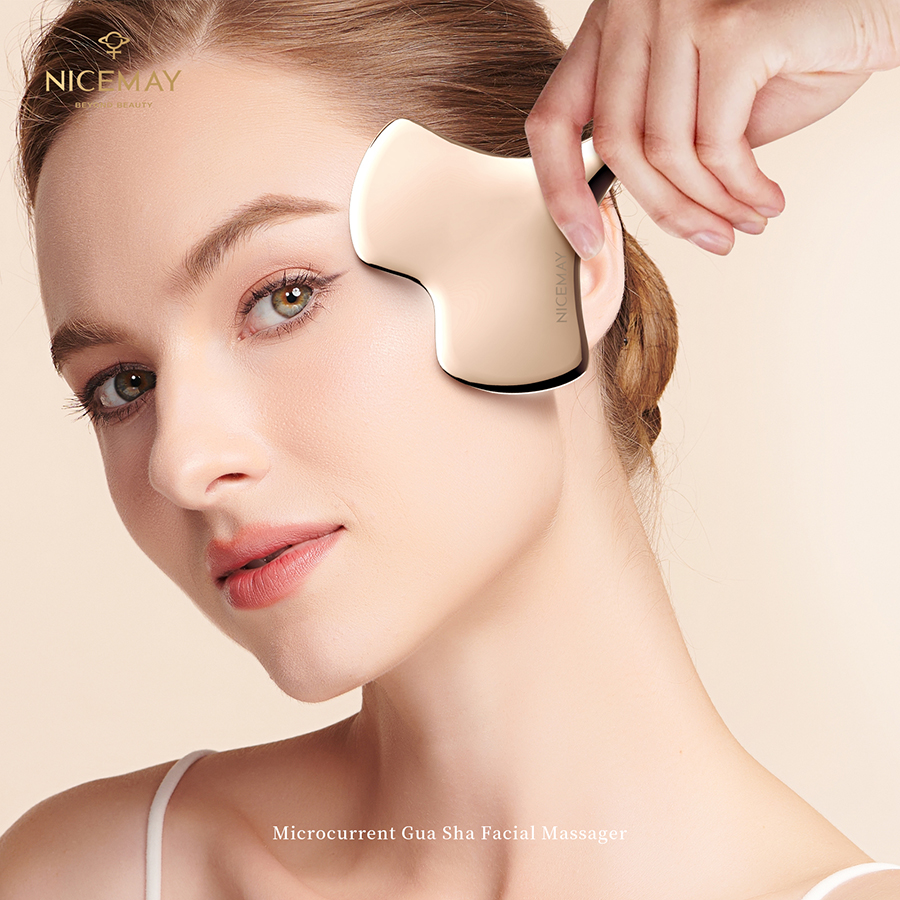
Pairing with microcurrent: Combining EMS (muscle-focused) with microcurrent (cellular ATP stimulation) on alternating days produces superior results to either modality alone. A well-designed device like the NICEMAY MR-2319 Silver Facial Roller Microcurrent Toning Device integrates microcurrent technology in a roller format that complements your EMS routine perfectly — the silver roller tip provides gentle conductivity while the microcurrent current works at the cellular level to boost collagen synthesis alongside your muscle toning sessions.
Safety Rules and Contraindications You Must Know
EMS delivers real electrical current to real tissue. That means real risks if misused. The safety profile for facial EMS is excellent when used correctly — but specific contraindications make the device genuinely dangerous for certain users.
Absolute Contraindications (Do Not Use)
- Cardiac pacemakers or implanted defibrillators: EMS current can interfere with device function. This is a hard stop — no exceptions.
- Metal implants in the face or jaw: Titanium plates, dental implants, or orthodontic expanders in the facial region can concentrate current unpredictably.
- Active skin conditions: Open wounds, active acne lesions, psoriasis flares, or rosacea in the treatment area. EMS through compromised skin can worsen inflammation and introduce infection.
- Epilepsy: Electrical stimulation on the face carries risk of triggering seizure activity.
- Pregnancy: Insufficient safety data exists for EMS use during pregnancy. Err on the side of caution.
- Thrombosis or blood clotting disorders: Electrical stimulation can affect blood flow dynamics.
Areas to Strictly Avoid
- Directly over the thyroid gland (front of throat)
- Eyelids or the orbital area around the eyes
- Directly over the carotid artery (side of neck)
- Lips and the immediate perioral area
A Note on Intensity Creep
In my work with clients transitioning from professional EMS sessions to at-home devices, the most common mistake I see is “intensity chasing” — incrementally raising the level session by session in pursuit of a stronger sensation. The goal is muscle activation, not maximum stimulation. A gentle, consistent twitch at moderate intensity for 8 weeks outperforms aggressive high-intensity sessions that fatigue and inflame the tissue.
Maximizing Results: What to Combine With EMS
EMS does not operate in isolation. The following complements amplify results significantly:
Hydration: Dehydrated muscles respond poorly to electrical stimulation. Drink at least 500ml of water in the 2 hours before a session. Skin hydration also directly lowers impedance, improving current delivery.
Collagen-supporting ingredients: Topical peptides (specifically Argireline and Matrixyl) applied post-session take advantage of the enhanced absorption window. A 2019 study in the Journal of Cosmetic Dermatology found that peptide penetration increased by up to 35% following micro-electrical stimulation compared to passive application.
Facial gua sha or lymphatic massage: Perform 5 minutes of upward gua sha strokes along the jawline on non-EMS days. This addresses fascial tension that can restrict the muscle movement EMS is trying to promote.
Avoid on the same day as: Retinoids, AHAs/BHAs, benzoyl peroxide, or any active exfoliants. These compromise the skin barrier, and EMS through a weakened barrier can cause localized irritation or chemical drive of actives deeper than intended.
Realistic Results: What to Expect at Each Milestone
Setting accurate expectations separates satisfied users from disillusioned ones. EMS works — but the timeline depends on age, baseline muscle tone, consistency, and device quality.
2 weeks: Improved muscle awareness in the jawline area, possible minor reduction in puffiness due to lymphatic drainage effects of the sweeping technique.
4–6 weeks: Visible reduction in jowl appearance for most users under 45. Older users or those with significant skin laxity may need 8+ weeks for equivalent results.
8–12 weeks: Measurable jaw definition — most users notice it in photographs and unsolicited comments before they see it themselves in the mirror (due to mirror habituation).
6 months: With consistent maintenance, results can be comparable to non-surgical jawline treatments costing $500–$2,000. This is where long-term at-home EMS users make their strongest case against clinic visits.
What EMS cannot do: tighten significantly loose skin (that requires RF or ultrasound energy), dissolve fat pads (targeted with cool sculpting or HIFU), or structurally redefine bone anatomy. If your concern is primarily skin laxity rather than muscle tone, EMS is one component of a multi-modality approach, not a standalone solution.
FAQs About How to Use an EMS Device on Your Jawline for a Slimmer Face
How long before I see results from using an EMS device on my jawline?
Can I use an EMS device every day on my jawline?
Does using EMS on the jawline hurt?
Can I use EMS on my jawline if I have fillers or Botox?
What's the difference between EMS and microcurrent for the jawline

Please fill in your email in the form and we’ll get back to assist you soon!